3D Model 13: 3D-Printable Hyperboloidal Gear Model
Introduction
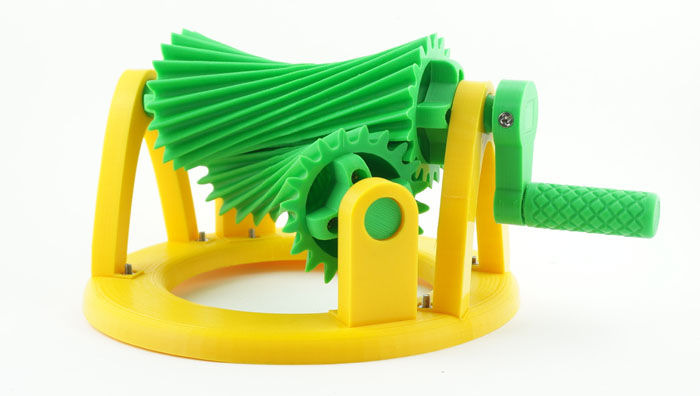
This gear model is full to the brim with mathematics, and it works well, too. The reference surface of each of these two gears is the one-sheet hyperboloid, which is formally defined as a "surface of revolution obtained by rotating a hyperbola about the perpendicular bisector to the line between the foci." The gears have an involute tooth profile. Also, the bearings for the top gear are shaped as parabolas, and the base is a plain circle.
This model transmits rotation between shafts crossed at 45°.
Download
Additional Notes
List of 3D-Printed Parts:
Hardware:
- 14 metric M3-12 Phillips-head countersunk screws;
- 12 metric M3 nuts.
Installation Instructions:
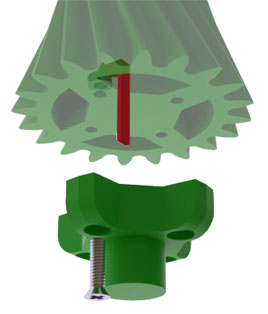
- While holding the gear upright, slide an M3 nut to its socket using a groove on the inside of the gear's bottom, as shown here by the red arrow.
- Attach the gear_end using an M3 screw.
- Insert the other 3 nuts into their sockets, and install 3 other screws one by one.
- Repeat steps 1 to 3 with the 2nd gear and gear_end_long.
- Mount the 1st gear between two lower brackets (stand_lower), insert the brackets into their slots on the base, secure with screws and nuts.
- Mount the 2nd gear between two upper brackets (stand_upper). insert the brackets into their slots on the base, secure with screws and nuts.
- Install the handle, align holes, secure with two screws.